


One of the things that is usually missed during deployments of iSCSI Storage with VMware vSphere first install is the NIC and Port Binding. So this article wants to provide a a quick view on how to setup VMware vSphere iSCSI Port binding. As we have already seen in the previous posts, VMware offers the ability to send the traffic using specific Physical Network Adapters and Switches. It is certainly an option we want to explore and benefit from also in our home lab as not only it can provide better performances for our Block Storage but it is also a best practice when installing and configuring VMware vSphere environments.
The purpose of this article is to provide a quick and effective overview of the steps to install and connect the VMware software iSCSI adapter including the details for VMware vSphere iSCSI Port Binding. Along with this walk through also come my final notes that can help with the design of you home lab.
Configure VMware vSphere iSCSI Port Binding
With regards to iSCSI connected Storage VMware ESXi Host ships with a software iSCSI adapter that we’ll use to connect to our storage. By navigating into the Host > Settings > Manage > Storage > Storage Adapter view and clicking to the green plus icon we can start by creating the software adapter interface as per screenshots below.

Let’s click ok to continue. Remember that in case the iSCSI Adapter is not needed in the feature will require a Host full reboot to complete the operation. So I would recommend to try in a home lab first!

A new interface adapter has been added also showing the iSCSI initiator name. This information is usefule to quickly identify multiple connections to a single iSCSI target.

Next is to move to the lower part to configure the first connection of this VMware iSCSI initiator to the iSCSI target. To do this let’s click on Dynamic Discovery and then Add button to specify the IP Address or Hostname of the server hosting the target LUNs.

Once confirmed the VMware ESXi Host now requires a rescan of the storage available at this address.

In my case I have unselected the first option as the new storage added is only available through iSCSI at the moment.

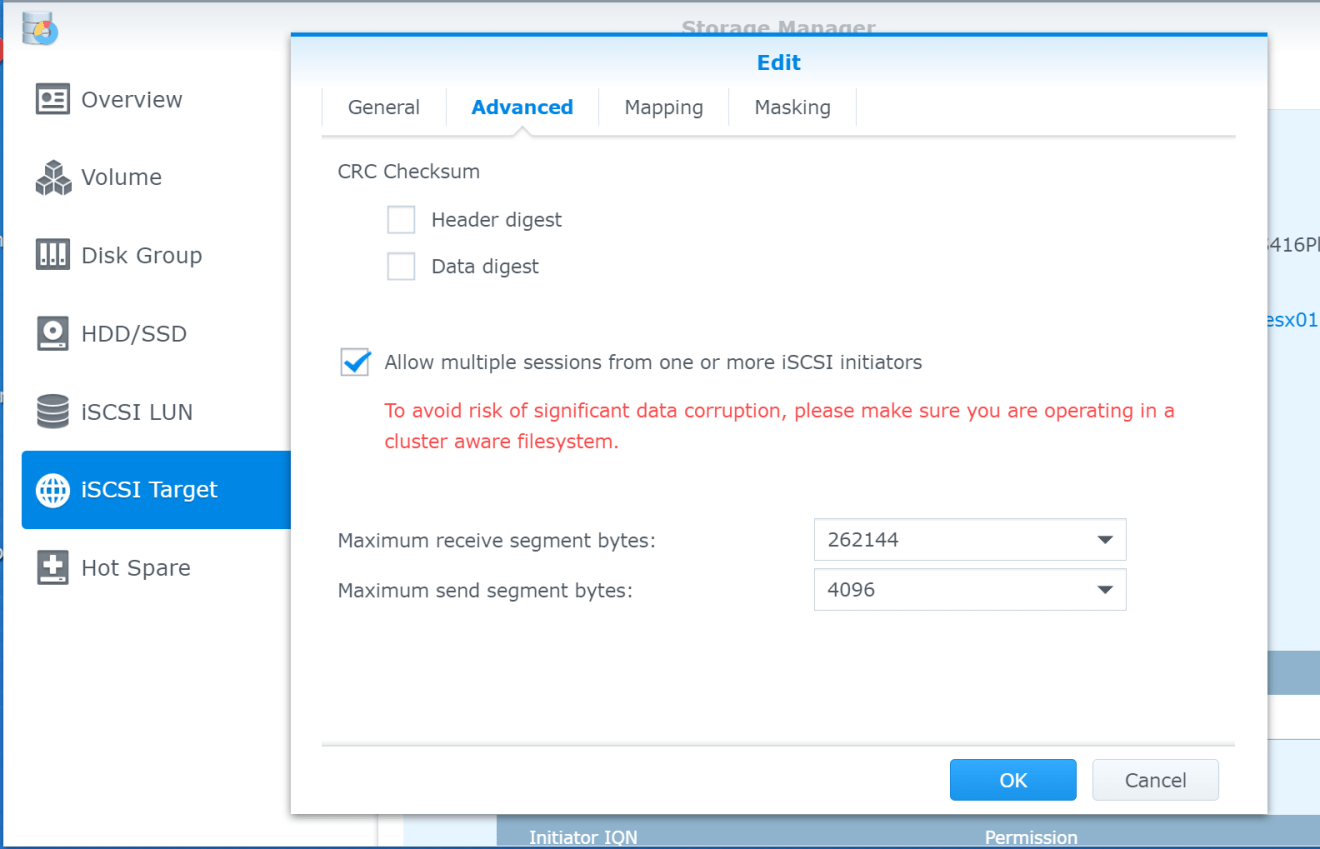
What might happen is that the iSCSI adapter might fail to discover new targets. Should this happen and granting the Name Resolution, IP Addressing and no Firewalls are blocking the communication (port 3260) one more option to check is the option to allow multiple sessions from different iSCSI initiators.
In my case using a Synology NAS the setting is in Storage Manager > iSCSI Target > choose the intended one > Advanced as per screenshot below. As per VMFS file system in VMware: yes it is Cluster aware!
A few seconds later back in the Storage Devices view we can now see the newly added shared storage between the VMware ESXi Hosts.

At this point what is happening is that the VMware ESXi Host is accessing the iSCSI Storage still using the built-in physical network adapter (usually the first one discovered upon Hypervisor installation) to “vmk0” and using the “Default” VMware TCP/IP Stack. The “Default” TCP/IP Stack is acting as a sort of “catch-all” configuration effectively routing all traffic types including vMotion, cold Provisioning, Fault Tolerance and last but not least Management traffic.
Next steps will now instruct the vSphere Host to direct the IPStorage traffic, iSCSI in our case, to a specific VMkernel (vmk1) bound to a different physical network card and a separate Switch if required. With regards to the creation of a new VMlernel interface I would suggest a quick read of this article. If you have this at ready then proceed with the steps as highlighted below.
From the Storage Adapter view and selecting the iSCSI software adapter, let’ move to the Network Port Binding tab and then click on add.

This view will now show the available and compliant VMkernel adapters created. As per picture beolw let’s make sure to select the intended one and also review the settings associated with it.

Once confirmed the screenshot below will look similar to this. Now the iSCSI traffic is routed through a dedicated NIC (vmk1) and dedicated Switch where for example we can operate with different settings like vLANs, Jumbo Frames, traffic shaping and more.
Of course to provide redundancy to IP Storage network we can create new VMkernel adapters associated to different physical adapters and configure them with VMware vSphere iSCSI Port Binding.
For example we can have a iSCSI 01 as Primay connection and iSCSI 02 as Secondary one should the first not be available. In addition the VMware vSphere also offer the options for multi-pathing network connections to datastores. So VMware vSphere iSCSI Port Binding becomes an effective way to segment Storage Traffic from other types.

And finally from the blue information icon we can find all the most important configuration details pertaining this connection.

A final note before closing this article. I did many test before writing this post to the point I had to perform a System Restore to the default settings! This also explains why the naming of the adapters might look different between this post and the previous ones.
Also I would like to note the following. The creation of a Custom TCP/IP Stack for IPStorage is required only when using a different domain broadcast from where the Management Network is sitting. This means that when creating the VMkernel adapter for the iSCSI storage the “Default” TCP Stack should be used.
This in other terms will make the newly created “vmk” compliant for serving the Storage traffic. Although it is true that Management and Storage traffic are using the same Gateway they will use physical separate wires to connect to the Physical Switches. It is still possible to further “isolate” these traffic types by creating vLANs which will be covered in a separate article in more details.
Hope this was useful and happy to welcome your feedback. Happy home labs!


Add Comment